
OS Setup
Before connecting with ChillShell, your PC needs to accept SSH connections. Follow the steps for your operating system. Download the Chill app to set up everything in three clicks, or follow the steps below for manual configuration.
1. Install OpenSSH
OpenSSH lets your PC accept remote connections from ChillShell. You need both the Client and the Server.
You must always install OpenSSH Client BEFORE OpenSSH Server. The Client is often already installed by default on Windows — if you don't see it in the available features, it's already active and you can go straight to the Server.
1. Open Windows Settings, then go to System > Optional features.
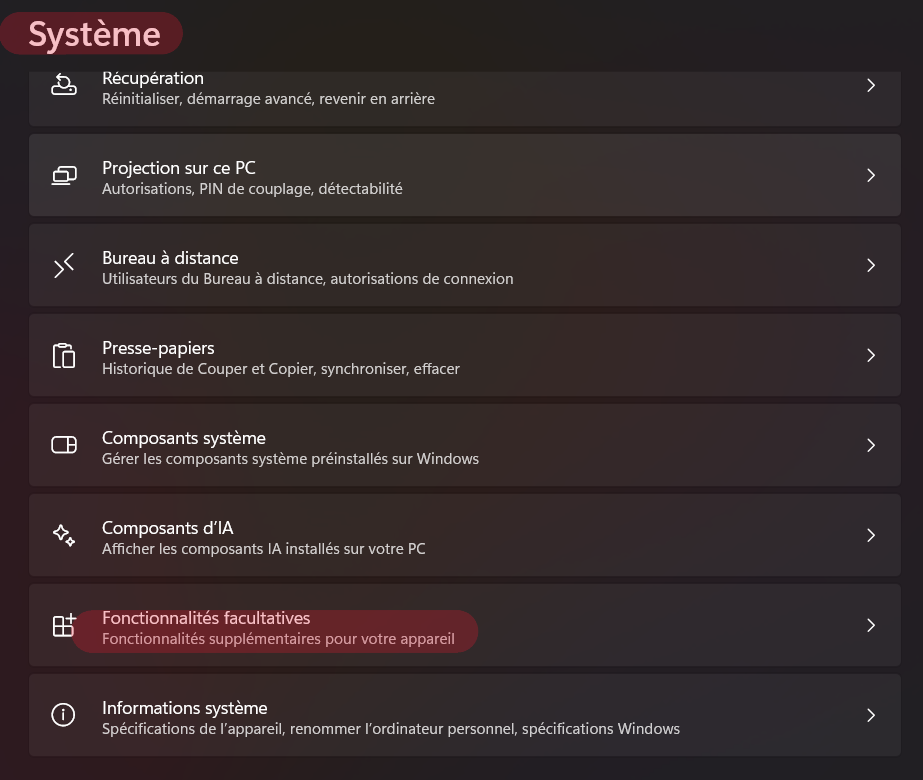
2. Click "View features".

3. Click "View available features".

4. In the search bar, type "open". If OpenSSH Client appears, add it FIRST on its own and wait for it to finish. Then add OpenSSH Server. If only OpenSSH Server appears, the Client is already installed — just add the Server.
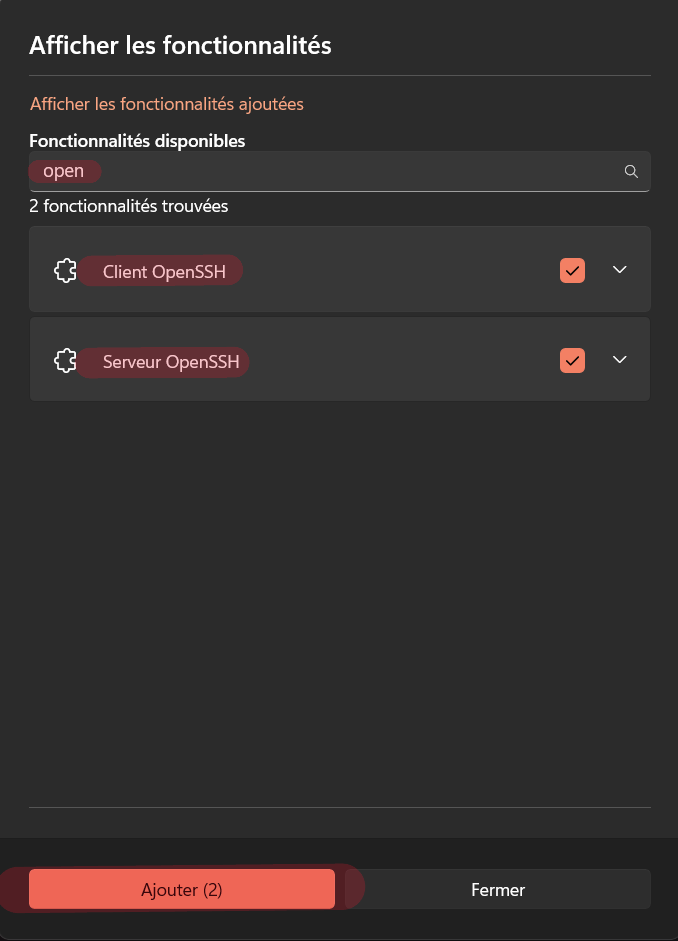
Restart your PC for the installation to take effect.
2. Start and auto-start the SSH service
After restarting, open PowerShell as administrator and run:
Start-Service sshd
Set-Service -Name sshd -StartupType Automatic
The first command starts SSH immediately. The second makes it start automatically at every boot.
3. Verify the installation
Check that OpenSSH is properly installed:
Get-WindowsCapability -Online | Where-Object Name -like 'OpenSSH*'You should see State: Installed for both Client and Server.
Check that the SSH service is running:
Get-Service sshdYou should see Status: Running.
4. Firewall check
Good news: when you install OpenSSH Server via Optional features, the firewall rule for port 22 is created automatically.
Get-NetFirewallRule -Name *ssh*If the rule doesn't appear, create it manually:
New-NetFirewallRule -Name 'OpenSSH-Server' -DisplayName 'OpenSSH Server (sshd)' -Enabled True -Direction Inbound -Protocol TCP -Action Allow -LocalPort 22Next steps
HUYNH Kevin
Creator of Chill